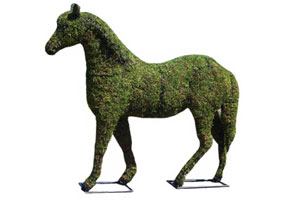
How to Make an Animal Topiary for Your Garden?
Explore our guide on how to make Topiary frames, topiary horses and more!
1) Plants to Use When Creating Animal Topiaries
2) Texture:
Take a few moments to look at your animal. Then look for plants which best represent it. Fur, feathers, mane; smooth, fluffy, scaly. Picture your animal dressed in plants. Don’t forget detail: whiskers in kittens, stripes for bees, and eyes for personality! Plant color can create a pattern in your animal.
3) Size:
Smaller leaf plants work best on smaller animals. The idea is to compliment, not overwhelm the form.
4) Winter Care:
a) Water well before frost
b) Mulch and /or move to a protected area or unheated garage near a window (water here about once a month)
5) Place form over a living Plant:
Let the plant (box wood, euonymus, ivy) grow into the form. Trim the plant until it fills the form.
A) Plant from the outside first:
Soak the moss filled form in water and let drain. If you have 'cell pack' sized plants (3/4”-1 ½” sq.) you can poke a hole into the damp moss from the outside of the form and insert the plant.
B) Plant from the Inside:
Soak the moss filled form in water and let drain. Snip the plastic connecting ties and open the form into its parts. Pull out some of the moss. Remove a little of the soil from around the root ball and insert your plant into the form. Wiggle the leaves up through the wires. Repack the moss around the roots. When planted, reattach the form with the cable ties provided.
If using A or B above, water with starter fertilizer 10-52-10 & keep in a shaded area, out of the wind for several days before moving to the selected area in your garden. Check for water daily, as you would a hanging basket. Fertilize every other week.
6) Sustainability: A must have is the ability to sustain the look of your topiary over time. Here, we present our recommendations to revive your topiary forms
7) ACHIEVEMENT:
Planting a topiary, taking care of it, determining its development and watching it grow-is a rewarding and fulfilling craft and art.
Below is our most popular topiary: "horse topiary frame mossed"!
.png)


.png)

